Here's how Betty Canuck makes Spaghetti without using a can of pre-flavoured store Pasta Sauce. That is how her hubby does it and truth be told, Betty Canuck loves that more than this version since *he* makes the supper then! [note: recipe at the end]
Start off with a diced onion, add in any left-overs if you have sitting around. For example, from home-made pizza night!

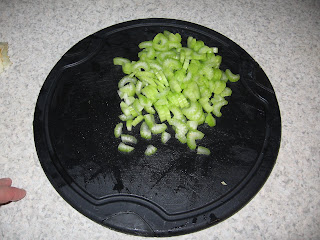
Then add two stalks of diced celery:

Put those two ingredients in a pan with a splash of olive oil on medium heat and start the saute till tender soft. Dig in the fridge for more left-overs, add the sliced mushrooms from Pizza night:

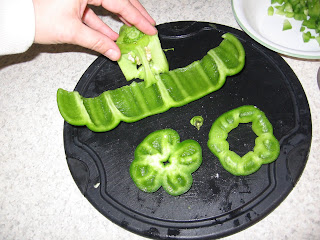
While those ingredients are softening and the mushroom juices are cooking 'off' prepare your green peppers now. Dice them up nice, or leave them in stick form if your kids will eat them that way. Mine, obviously, wont! Since someone gave me two sad looking peppers today that clearly had not another day left in them, I ended up dicing up both for tonight but 1/2 to 1 whole pepper would be plenty on a normal night, pictured below is 1 pepper.

Once that is done, add garlic to your sauce, you have a choice, prepared garlic for $3.00 for a 4 cup jar from the Indian food store or the garlic from your Garden Share box...

Betty Canuck choose prepared tonight, and adds 2 tsp worth: (approx. the equivalent of 2 cloves)

Once the veggies are nicely softened and you start to see sticking to the bottom of the pan insert your meat. Our meat happens to have been raised by us in our previous life on the farm. Since we moved to the city, Moo-ses came along in this form:

Add your salt & pepper, approx. 1 tsp salt & 1/2 tsp pepper... okay, fine, fine, fine... truth is normally I do 1/2 tsp salt & 1/4 tsp pepper but tell my Dh otherwise and when your photog is your Dh, you kind of have to go the other way!

Now for the ingredient that once added almost promises my husband will adore the supper, 1 tbsp Worcestershire sauce!

Add some herbs, typically I add 1 tsp each of basil, oregano & thyme, but I'm a little short, so I skipped the thyme here and added some of my herbes du Provencal from Victorian Epicure to make up the difference tonight. Basically this is something you need to figure out what you like!

Since I love the taste of a roasted garlic, I added a wee bit of Roasted Garlic, sorry for the photo quality!

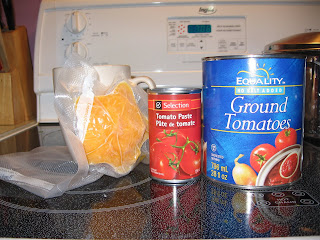
Get out your sauce choices. Here's the scoop, you can add diced tomatoes OR ground tomatoes OR take a can of whole tomatoes and dice them up OR add two small cans of puree and add some water OR you can take 6 - 8 fresh whole tomatoes and dice them up and add them. And you can add up to 2 cups of the 'mystery vegetable.' Use more mystery vegetable with the fresh tomatoes to give it a better sauce, less with tomato paste! Tonight I added the can of ground tomatoes and 1 cup of pumpkin. My Dh was not needed for this photo, and had no clue until he saw me uploading the pictures that he had "mystery ghetti" tonight and reports that it was excellent.

So first add the frozen 'mystery.' Note: I freeze the squash, cooked, in muffin tins and my mini-individual cake pans, this time I happened to use star shaped cake pans, lol!

While cooking, be sure not to step on the assistant foot warmer. He is kept dancing while I cook! Snag your can opener and add the tomato of your choice.

Now is the time to get your water boiling to a vigorous boil. Note: I start my pan of water the minute I start making supper. Then once it has boiled, I turn it off. When we get to this point of the cooking, it takes less than 3 minutes to get back to a vigorous boil! See the mystery vegetable below?

Once boiling, add your oil and salt. If it stops boiling, then you didn't get it hot enough the first time and wait until the water is boiling as pictured above! The amounts are entirely up to you but about 1 tbsp oil is more than enough and 1 tsp salt is excessive :) . Naturally that is my opinion because that is what Mr. Canuck said to use when I hadn't posted amounts!


Next, add your noodles. I'm a wee bit anal and switched us over to whole wheat a long time ago. We love it. And honestly my kids now complain about white noodles. Dh on the other hand, just complains ;)

Insert the amount you will cook into the pot:

Use the spatula you used to empty your can to gently slide the noodles down into the water after a few seconds:

Set your timer to al dente time, it will say on the box and it changes for type of noodle, so check! Here it was for 8 minutes!

Now stir your pots, alternating between the sauce and the noodles. For the sake of tonight I used two separate tools, but often I just use the same one but it makes the noodles look gross. That's okay though as the sauce goes on them anyways!

I bet you thought I forgot something! NOW is the time to add the Green Peppers. Green peppers are often over cooked.

You want to basically cook the green peppers for no longer than 10 minutes. Just green them up pretty and leave them with a wee bit of crunch :)

Although it has only been a total of 30 minutes, your assistant is likely pooped. Slide him to the side and continue to cook:

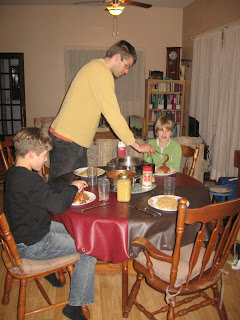
Just kidding, the meal is ready once the timer goes, drain the noodles and quickly move the food quickly to the table. We love this served with Parmesan Cheese sprinkled on top!

Betty Canuck's Spaghetti Supper:
1 onion ~ diced
2 stalks celery ~ diced
1 - 2 tsp olive oil
1 green pepper ~ diced, note: you can add here or when noodles are put on to cook. But prepare them now.
-combine above into 3 quart sauce pan over medium heat and fry till onion is soft. You can add leftover ingredients at this point!
2 cloves of garlic, minced, or the equivalent
-add to above
1 lb extra lean ground beef
1/2 tsp salt
1/4 tsp pepper (can be a pinch)
1 tbsp Worcestershire sauce
-add to the above and fry until well browned.
1 tsp each: Basil, Thyme & Oregano or some sort of Italian spice mix
-add to above, can add spontaneous roasted garlic as well :)
Once meat is cooked, add your tomato choice and optional mystery vegetable:
2 smallish cans tomato paste plus 1 cup water OR
1 can diced or pureed tomatoes OR
6 - 8 fresh tomatoes, diced, pureed (but remove the seeds first then!), or whatever way!
and anywhere from:
1/2 - 2 cups mystery vegetable, perferably something red and squash in nature. Beets tend to be a poor choice here!
Meanwhile, cook your noodles.


